The Computed Tomography (CT) equipment in the Metrology laboratory is used for both activities of the MM section:
- Non-Destructive Testing (NDT) to assess the material health
- Metrology to characterise the dimensions, geometry and shapes especially in samples and parts which exhibit complex geometries with little access to internal structures.
The CT equipment (Zeiss Metrotom) is used as a non-invasive approach which is capable of obtaining accurate measurements upon specimens with which other technologies, such as CMM, would fail to facilitate.
Zeiss Metrotom 1500
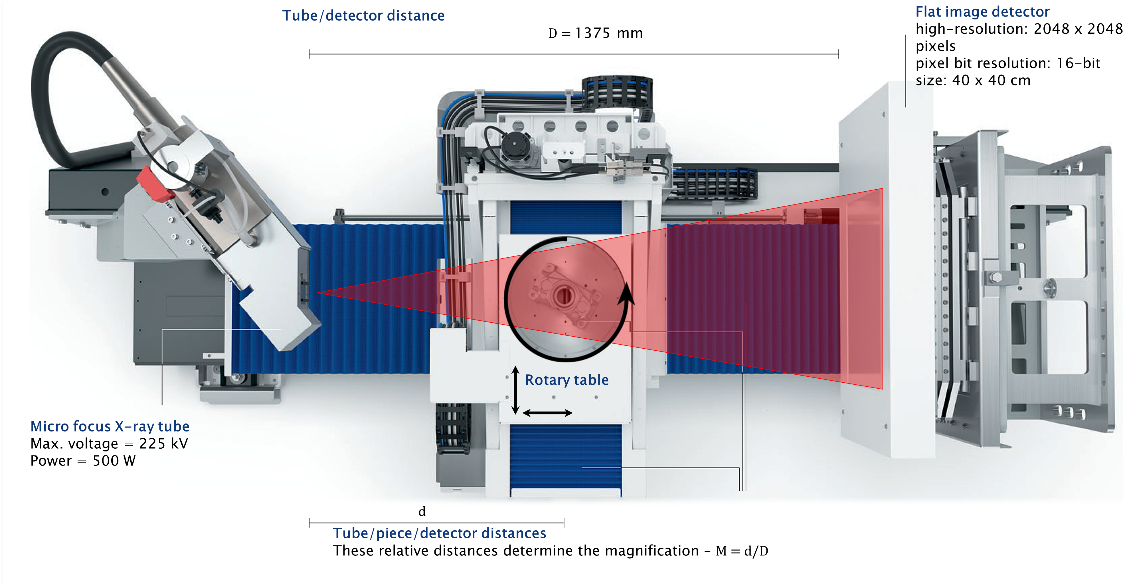
| FDD | 1500 mm |
| Max. voltage | 225 kV |
| Focal spot size | 7 μm |
| Imager | 2048 x 2048 pixels |
| Max. pixel size | 200 μm |
| Image processing | 16-bit |
| Grey scales | 65535 |
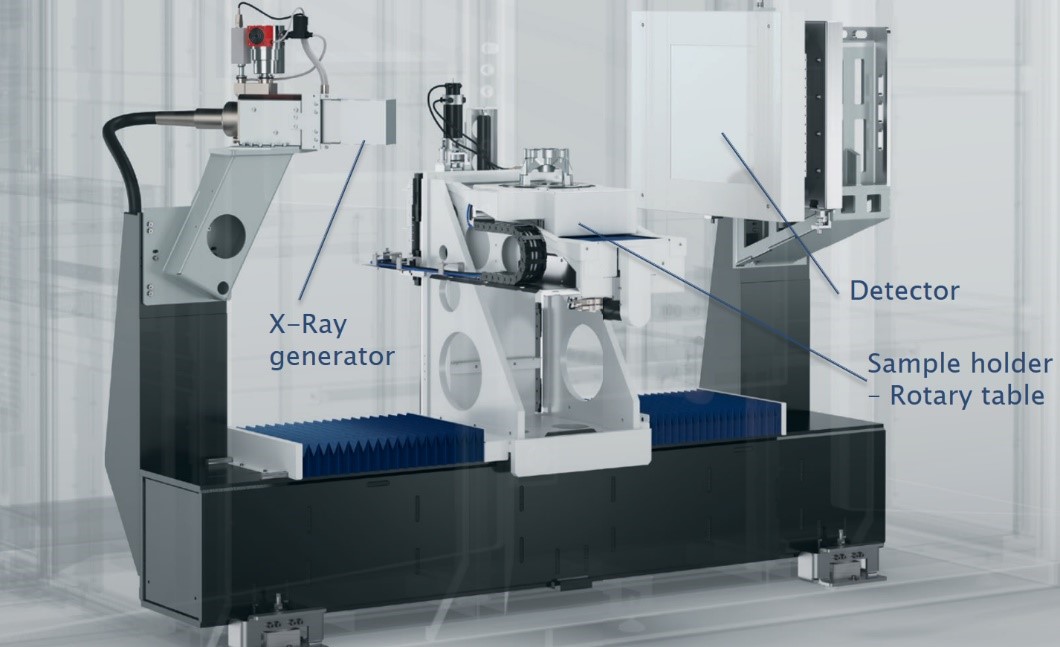
Below is a representation of the micro-tomograph internal arrangement displaying the rotary table allowing for a full 360 degree 3D representation to be built.
 |
|
 |